How-to
How to make your own silicone molds for resin at home
Published
As an Amazon Associate we earn from qualifying purchases. This does not change our picks. Affiliate disclosure
New to Prime? Try Prime free for fast, free shipping on eligible items.
Short answer
Glue the object into a leak-proof box with at least 1/2 in of space on every side, mix two-part mold silicone 1A:1B by volume and pour it in a thin stream until it stands 1/2 in above the object. For the two Smooth-On silicones used as examples, pot life is 30 to 50 minutes and cure takes 4 to 6 hours. Then peel the mold off and it is ready for resin.
Gear for this job
All 7 picks comparedLET'S RESIN casting resin kit, 34 oz
See price on AmazonSee it on AmazonLET'S RESIN deep pour epoxy resin, 51 oz
See price on AmazonSee it on AmazonTeexpert clear epoxy resin kit, 64 oz
See price on AmazonSee it on Amazon
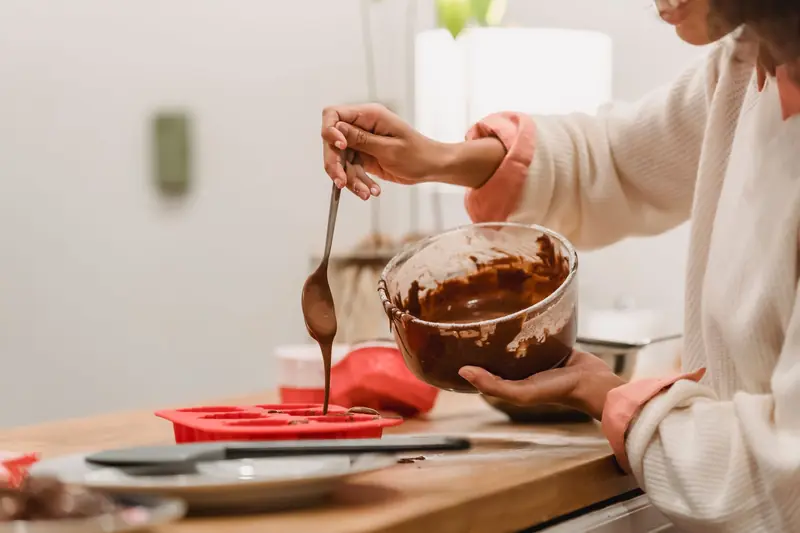
This page shows the simplest reusable mold: a one-part block mold, poured over an object (the master) that has one flat side to sit on. It suits coasters, cabochons, drawer pulls and small figures without deep undercuts. The numbers come from Smooth-On's technical bulletins for Mold Star 15 SLOW and OOMOO 30, two silicones mixed 1:1 by volume that need no scale and no vacuum pump. Other brands have other times, so read your label. The last section covers the no-silicone options people ask about, with their limits.
What silicone to use for resin molds
Use a pourable two-part mold-making silicone, sold as Part A and Part B. There are two families. Platinum-cure silicone, such as Mold Star, is described by its maker as tear resistant and long lasting, but contaminants can stop it from curing. Tin-cure silicone, such as OOMOO, is sold for the novice mold maker and simple block molds, and has lower tear strength.
| Property | Mold Star 15 SLOW | OOMOO 30 |
|---|---|---|
| Type | Platinum-cure silicone | Tin-cure silicone |
| Mix ratio | 1A:1B by volume, no scale needed | 1A:1B by volume (100A:130B by weight) |
| Pot life | 50 minutes | 30 minutes |
| Cure time | 4 hours | 6 hours |
| Hardness | Shore 15A, softer | Shore 30A, firmer |
| Tear strength | 88 pli | 40 pli |
| Release agent before casting epoxy | Not usually necessary | Recommended by the maker |
How much silicone do you need for the mold?
Silicone needed = volume of the box up to the fill line, minus the volume of the object. Measure the inside of the box in inches and multiply length x width x fill height. The fill height is the object's height plus 1/2 in. Multiply cubic inches by 16.4 to get milliliters. Measure the object as a simple block or cylinder and round its volume down, so you mix slightly too much, not too little. The shape formulas in the resin calculator work for silicone volume too.
Example: an object 2 x 2 x 1 in sits in a box that is 3 x 3 in inside and is filled to 1.5 in. The box holds 13.5 cubic inches up to the fill line and the object takes up 4, leaving 9.5 cubic inches, about 155 ml. That is roughly 78 ml of Part A and 78 ml of Part B. Smooth-On lists Mold Star 15 at 1.18 g per ml, so the same mold takes about 184 g of silicone.
How to make a silicone block mold, step by step
Work at room temperature. Smooth-On gives 73 F (23 C) and says not to cure the rubber below 65 F (18 C). A warmer room shortens the pot life. Wear vinyl gloves, safety glasses and long sleeves. Use a mixing cup with straight sides and a flat bottom, and a flat, stiff stir stick.
- 1
Prepare the master. Clean and dry it. Seal porous materials such as wood or plaster with a clear acrylic lacquer spray and let it dry fully, or the rubber can lock into the pores.
- 2
Fix the master to a flat, non-porous base with hot glue, flat side down, so it cannot float in the liquid rubber. Smooth-On uses melamine board.
- 3
Build walls around it, leaving at least 1/2 in (1.3 cm) between the master and each wall. Seal every seam and corner on the outside with hot glue so the box is watertight.
- 4
Stir Part A and Part B separately in their own containers, then measure equal volumes into the mixing cup: 1A:1B by volume for both example silicones.
- 5
Mix thoroughly, scraping the sides and bottom of the cup several times, until the color is uniform with no streaks. Smooth-On gives 3 minutes of mixing for OOMOO.
- 6
Pour in a thin stream into a single spot at the lowest point of the box, not onto the master. Let the rubber find its own level and rise over the object, which pushes air out ahead of it.
- 7
Stop when the silicone stands at least 1/2 in (1.3 cm) above the highest point of the master. Pot life is 30 to 50 minutes with the example silicones, so there is no need to rush.
- 8
Leave the box level and undisturbed for the full cure: 4 hours for Mold Star 15 SLOW, 6 hours for OOMOO 30, at 73 F.
- 9
Take the walls off, peel the silicone back slowly and push the master out. Isopropyl alcohol softens hot glue that will not let go.
Why silicone stays gummy: cure inhibition
Platinum silicone that stays tacky where it touched the master, or never sets at all, has been inhibited by a contaminant. Smooth-On lists latex, sulfur clays, certain wood surfaces, newly cast polyester, epoxy or urethane, and tin-cure silicone. This is why its bulletins say to wear vinyl gloves only: latex gloves will inhibit the cure. One or more coats of clear acrylic lacquer on the master usually prevent inhibition, with one exception. Mold Star will not cure against a surface that contains sulfur, even when sealed.
If you are unsure about a master, test first. Put a small amount of mixed silicone on a spot that does not matter and wait the full cure time. Gummy or uncured rubber means inhibition. This matters when you copy your own resin pieces: newly cast epoxy is on Smooth-On's list. Let the piece reach full cure, 72 hours for most casting epoxy, then seal it or test it before molding.
How to tell the mold is done and ready for resin
A cured mold is firm and rubbery all over, peels cleanly from the master and leaves no wet or sticky rubber behind. The cavity should show the master's surface exactly: glossy where the master was glossy, since resin will copy that surface in turn. Trim thin flash at the opening with scissors. Make sure the cavity is clean and fully dry before the first pour. Care between pours is covered in how to clean resin molds.
For a tin-cure mold such as OOMOO, Smooth-On describes a post cure: 4 more hours at 150 F (65 C) removes residual moisture and alcohol left by the cure, which may inhibit some resins. Let the mold cool to room temperature before use. Smooth-On also recommends a release agent in OOMOO molds before casting epoxy, to prevent sticking and mold degradation. Options are in mold release substitutes.
Note.Molds meant for pressure casting are made under pressure too. See the pressure pot guide before you pour silicone for that purpose.
How to make resin molds at home without silicone
There are ways, with limits. Epoxy does not bond well to polyethylene-type plastics, wax paper or the shiny side of packing tape, so a rigid form made of these or lined with them will let a casting go. A polyethylene food container, or a small box of board lined with packing tape, works for slabs, blocks and trays.
The limits are the reason silicone is standard. A rigid form cannot be peeled away, so the shape needs straight or tapered sides and no undercuts. The casting copies every tape seam and wrinkle. And a rigid form does not copy an existing object: that takes a rubber that flows around the master. For small objects, two-part silicone putty skips the box and the pouring. Resin Obsession kneads equal parts for about 1 minute, presses the putty around the model 1/2 to 3/4 in thick and lets it cure for 30 minutes. It is still silicone, but there is nothing to measure by volume or pour.
Quick answers
Short answers on making your own resin molds. Times and ratios are from Smooth-On bulletins for two example silicones, so check your own label.
- Can you make your own resin molds? Yes. A one-part block mold needs a box, hot glue, two-part mold silicone and 4 to 6 hours of cure time.
- What silicone for resin molds? A pourable two-part mold-making silicone mixed 1A:1B by volume. Mold Star 15 (platinum) is rated at 88 pli tear strength, OOMOO 30 (tin) at 40 pli.
- How to build a resin mold? Glue the object to a base, build watertight walls 1/2 in away, pour mixed silicone to 1/2 in above the object and let it cure.
- How to make resin molds for beginners? Start with a small flat-backed object and a 1:1 by volume silicone. No scale or vacuum pump is needed.
- How to make resin molds at home without silicone? Line a rigid box with packing tape or use a polyethylene container. This only suits simple shapes with no undercuts.
What you need for this
- See price on AmazonAmazon
LET'S RESIN casting resin kit, 34 oz
From Best epoxy resin for silicone molds: clear casting picks
- See price on AmazonAmazon
DecorRom water-based mold release spray, 7 fl oz
From Best mold release spray for epoxy resin and silicone molds
- See price on AmazonAmazon
California Air Tools 255C casting pot, 2.5 gal
From Best pressure pot for resin casting: sizes, PSI and setup
- See price on AmazonAmazon
VEVOR 3 Gallon Vacuum Chamber with Pump